Introduction to Kitchen Water Shut Off Valves
A kitchen water shut off valve is a crucial component of your home's plumbing system, designed to control the flow of water to specific fixtures such as sinks, dishwashers, and refrigerators. These valves provide a convenient means to stop water supply in case of leaks, repairs, or maintenance without disrupting the entire household's water supply. Understanding the different types of kitchen water shut off valves, their functions, installation processes, maintenance requirements, and benefits can empower homeowners to manage their plumbing systems more effectively and prevent potential water damage.
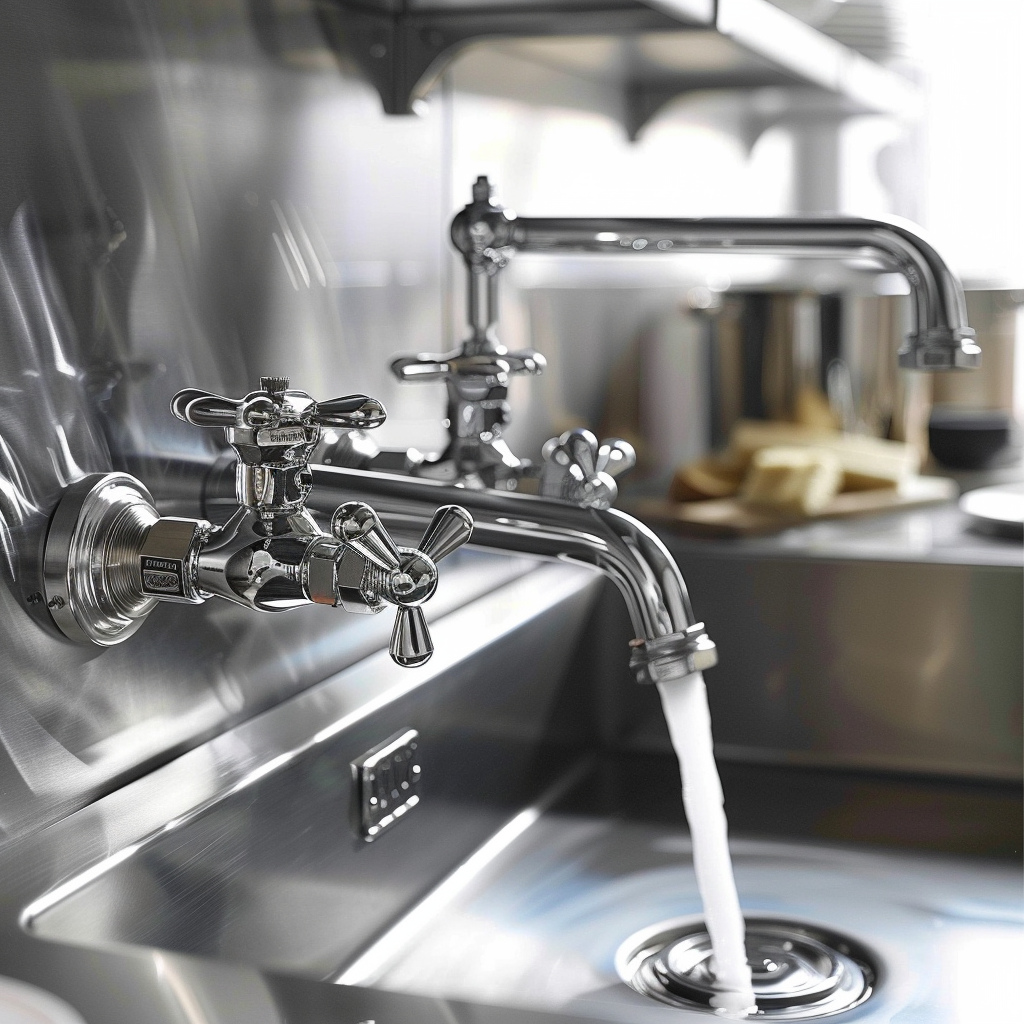
Types of Kitchen Water Shut Off Valves
There are several types of shut off valves commonly used in kitchen plumbing. Each type has unique features, advantages, and suitable applications. The most prevalent types include:
1. Ball Valves
Description:
Ball valves consist of a spherical ball with a hole through its center. The ball rotates within the valve body to open or close the flow of water. A quarter-turn of the handle aligns the hole with the pipe, allowing water to flow, while rotating it perpendicular blocks the flow.
Advantages:
-
Quick Operation: Shuts off water instantly with a single quarter-turn.
-
Durability: Made from robust materials like brass or stainless steel, ensuring a long lifespan.
-
Leak-Resistant: Provides a tight seal when closed, minimizing the risk of leaks.
Disadvantages:
-
Cost: Generally more expensive than gate valves.
-
Limited Flow Control: Best suited for on/off control rather than precise flow regulation.
Ideal For:
Ball valves are ideal for main shut off points and fixtures that require frequent operation, such as dishwashers and kitchen sinks.
2. Gate Valves
Description:
Gate valves use a flat or wedge-shaped gate to control water flow. The gate moves up and down between two seats in the valve body. When fully open, the gate retracts, allowing unobstructed flow, and when closed, it seals tightly against the seats.
Advantages:
-
Reliable Sealing: Provides a dependable seal when fully closed.
-
Minimal Pressure Drop: Ensures efficient water flow when fully open.
-
Simple Design: Straightforward mechanism with few moving parts, reducing maintenance needs.
Disadvantages:
-
Slow Operation: Requires multiple turns to open or close, making it less convenient for quick shut-offs.
-
Prone to Wear: Over time, sediment buildup can affect the gate’s movement, potentially leading to leaks.
Ideal For:
Gate valves are suitable for main water lines and fixtures that do not require frequent operation. They are commonly found in older homes where their robust design has stood the test of time.
3. Globe Valves
Description:
Globe valves feature a spherical body and use a movable disk to regulate water flow. The disk moves perpendicular to the flow, allowing precise control over water velocity and pressure.
Advantages:
-
Flow Regulation: Excellent for adjusting water flow and pressure.
-
Tight Sealing: Ensures a reliable shut-off, preventing leaks.
-
Durability: Constructed from high-quality materials, providing longevity.
Disadvantages:
-
Higher Pressure Drop: Not as efficient as ball or gate valves, making them less suitable for applications requiring minimal resistance.
-
Bulkier Design: Takes up more space, which can be a constraint in tight kitchen areas.
Ideal For:
Globe valves are best suited for applications where precise control over water flow is necessary, such as adjusting water flow to a kitchen faucet or a dishwasher.
4. Compression Valves
Description:
Compression valves use a threaded nut and a compression ring to form a watertight seal around the pipe. Tightening the nut compresses the ring against the pipe, stopping water flow.
Advantages:
-
Easy Installation: Can be installed without specialized tools, making them suitable for DIY projects.
-
Versatile: Compatible with various pipe materials, including copper and plastic.
-
Cost-Effective: Generally more affordable than ball or gate valves.
Disadvantages:
-
Maintenance Required: Compression rings can wear out over time, necessitating periodic replacement.
-
Less Durable: Not as long-lasting as metal-based valves, making them suitable for low to medium pressure applications.
Ideal For:
Compression valves are ideal for kitchen fixtures like sinks and dishwashers, where repairs and replacements are more common.
5. Angle Valves
Description:
Angle valves connect water lines at a 90-degree angle, making them ideal for installations where the pipe exits the wall at an angle or to accommodate space constraints under the sink.
Advantages:
-
Space-Saving Design: Fits well in tight spaces, such as under kitchen sinks.
-
Easy Access: Positioned conveniently for quick shut-offs and maintenance.
-
Versatile Installation: Suitable for both horizontal and vertical pipe runs.
Disadvantages:
-
Limited Flow Control: Primarily designed for on/off control rather than precise flow regulation.
-
Potential for Leaks: If not installed correctly, angle valves can be prone to minor leaks.
Ideal For:
Angle valves are commonly used under kitchen sinks and for fixtures where the pipe exits the wall at an angle, providing accessible control over water flow.
Functions of Kitchen Water Shut Off Valves
Kitchen water shut off valves perform several essential functions that contribute to the overall efficiency and safety of the plumbing system:
1. Emergency Water Control
In the event of a leak, burst pipe, or appliance malfunction, kitchen shut off valves allow homeowners to quickly stop the flow of water, preventing extensive water damage and reducing repair costs.
2. Maintenance and Repair
When performing maintenance or repairs on kitchen fixtures or appliances, shutting off the water supply to specific areas allows for safe and efficient work without disrupting the entire house’s water supply.
3. Water Conservation
By controlling water flow to specific fixtures, shut off valves help in conserving water, especially when fixtures are not in use or during periods of low water demand.
4. System Isolation
Shut off valves enable the isolation of particular sections of the plumbing system, allowing for targeted control and management of water flow to different kitchen components.
Installation of Kitchen Water Shut Off Valves
Proper installation of kitchen water shut off valves is crucial to ensure their functionality and longevity. While some homeowners may opt for DIY installations, professional installation is often recommended to ensure compliance with plumbing standards and to avoid potential issues.
1. Preparation
-
Tools and Materials Needed:
-
Pipe cutter
-
Adjustable wrench
-
Teflon tape
-
Compression fittings or soldering equipment (depending on valve type)
-
Pipe cleaning tools
-
Turn Off the Main Water Supply: Before beginning any installation, ensure that the main water supply is turned off to prevent water flow during the process.
2. Locate the Pipe
Identify the water line leading to the kitchen fixture where the shut off valve will be installed. Common locations include under the sink or behind appliances.
3. Cut the Pipe
Use a pipe cutter to cut the water line at the desired installation point for the shut off valve. Ensure the cut is clean and free from burrs to facilitate proper fitting.
4. Install the Valve
-
For Compression Valves:
-
Slide the compression nut and ring (ferrule) onto the pipe.
-
Insert the valve into the pipe.
-
Tighten the compression nut with an adjustable wrench until it is snug but not over-tightened to avoid damaging the pipe.
-
For Ball or Gate Valves:
-
If soldering, clean the pipe ends and apply flux before soldering the valve in place.
-
For threaded connections, apply Teflon tape to the threads and screw the valve onto the pipe securely.
5. Test the Valve
Once installed, turn the main water supply back on and test the shut off valve by opening and closing it to ensure it operates smoothly and there are no leaks.
6. Secure the Valve
Ensure the valve is securely fastened and properly aligned for easy access and operation.
Maintenance of Kitchen Water Shut Off Valves
Regular maintenance of kitchen water shut off valves ensures their reliable performance and extends their lifespan. Follow these best practices to maintain your valves effectively:
1. Regular Inspections
-
Frequency:
Inspect shut off valves at least twice a year and after any plumbing repairs or replacements.
-
What to Look For:
Check for signs of leaks, corrosion, or wear on the valve body and connections.
2. Operate the Valve Periodically
-
Purpose:
Prevents the valve from seizing and ensures smooth operation.
-
How:
Open and close the valve fully about once every few months.
3. Clean and Lubricate
-
Cleaning:
Remove any debris or buildup around the valve to maintain unobstructed operation.
-
Lubrication:
Apply a suitable lubricant to the valve stem to reduce friction and prevent rust, especially for older valves.
4. Address Issues Promptly
-
Leaks:
Tighten connections or replace faulty seals if minor leaks are detected.
-
Corrosion and Wear:
Replace the valve if corrosion is severe or if the valve does not operate smoothly despite maintenance efforts.
5. Professional Servicing
For valves that are difficult to operate, show signs of significant wear, or require specialized tools for maintenance, seek assistance from a professional plumber.
Benefits of Kitchen Water Shut Off Valves
Installing kitchen water shut off valves offers numerous advantages that enhance the safety, efficiency, and longevity of your home’s plumbing system:
1. Water Damage Prevention
Quickly shutting off water supply during leaks or pipe bursts minimizes the risk of water damage to your kitchen and adjacent areas, reducing repair costs and property damage.
2. Enhanced Safety
By isolating water supply to specific fixtures, shut off valves prevent accidents related to sudden water flow, such as scalding or slippery floors due to leaks.
3. Ease of Maintenance and Repairs
Shut off valves allow for convenient maintenance and repair of kitchen fixtures and appliances without affecting the entire household’s water supply, making plumbing tasks more manageable.
4. Water Conservation
Controlling water flow to specific fixtures helps in conserving water, especially during periods of low usage or while performing maintenance tasks.
5. System Longevity
Properly maintained shut off valves protect plumbing systems and appliances from wear and tear caused by constant water flow, thereby extending their operational lifespan.
6. Improved Efficiency
Efficient control over water supply reduces unnecessary water wastage and ensures that water is available when and where it is needed, enhancing overall kitchen functionality.
Troubleshooting Common Issues
Despite their reliability, kitchen water shut off valves can occasionally encounter issues. Here are some common problems and their troubleshooting steps:
1. Valve Sticking
Problem:
Difficulty in turning the valve handle due to debris buildup or corrosion.
Solution:
-
Regular Operation: Frequently operate the valve to prevent sticking.
-
Lubrication: Apply lubricant to the movable parts to ease operation.
-
Cleaning: Remove any visible debris or buildup around the valve.
2. Leaking Valve
Problem:
Water leaking around the valve handle or connections.
Solution:
-
Tighten Connections: Use an adjustable wrench to tighten loose connections.
-
Replace Seals: If seals or gaskets are worn out, replace them to restore a watertight seal.
-
Valve Replacement: If leaks persist, consider replacing the entire valve.
3. Corrosion
Problem:
Surface corrosion affecting the valve’s appearance and functionality.
Solution:
-
Inspection: Regularly inspect the valve for signs of corrosion.
-
Protective Coatings: Apply anti-corrosion coatings to metal valves to prevent further deterioration.
-
Replacement: Replace severely corroded valves to maintain system integrity.
4. Over-Tightened Handles
Problem:
Handles that are too tight can cause stress on the valve components, leading to damage and leaks.
Solution:
-
Adjustment: Loosen the handle slightly if it feels too tight.
-
Avoid Excessive Force: Do not apply excessive force when operating the valve to prevent damaging internal components.
5. Gas Blockage (for Gas Faucets)
Problem:
Not directly related to water shut off valves, but in cases where a kitchen faucet is dual-purpose with gas, blockage can affect operation.
Solution:
-
Professional Assistance: Seek help from a qualified technician to address gas-related blockages and ensure safe operation.
Choosing the Right Kitchen Water Shut Off Valve
Selecting the appropriate shut off valve for your kitchen involves considering several factors to ensure optimal performance and compatibility with your existing plumbing system:
1. Valve Type
-
Ball Valves: Best for quick shut-off needs and areas requiring frequent operation.
-
Gate Valves: Suitable for low-frequency usage and main water supply lines in older homes.
-
Globe Valves: Ideal for applications requiring precise flow control.
-
Compression Valves: Excellent for DIY installations and fixtures needing easy access.
2. Material
-
Brass: Durable and corrosion-resistant, making it ideal for most kitchen applications.
-
Stainless Steel: Offers superior strength and resistance to corrosion, suitable for high-use areas.
-
Plastic (PVC/CPVC): Cost-effective and suitable for low-pressure systems, though less durable than metal options.
3. Pipe Compatibility
Ensure the shut off valve is compatible with your pipe material, whether it’s copper, PEX, CPVC, or galvanized steel. Incorrect compatibility can lead to leaks and inefficient operation.
4. Size and Flow Requirements
Choose a valve size that matches your existing pipes to maintain water flow efficiency. Over-sized or under-sized valves can cause turbulence, pressure drops, and reduced functionality.
5. Ease of Operation
Consider how often you'll need to operate the valve. Valves that require fewer turns or quick operation are preferable for fixtures that are used frequently.
6. Budget
While high-quality valves offer durability and better performance, balance your choice with budget considerations. Plastic valves are more affordable but may not provide the same longevity as metal valves.
Installation Best Practices
To ensure the effective functioning of kitchen water shut off valves, adhere to the following installation best practices:
1. Follow Manufacturer’s Instructions
Always refer to the valve manufacturer’s installation guidelines to ensure correct setup and operation.
2. Use Proper Tools
Utilize appropriate tools such as pipe cutters, wrenches, soldering kits (for copper pipes), and compression tools to install the valve securely and leak-free.
3. Ensure Tight Seals
Apply Teflon tape to threaded connections and use appropriate sealants to prevent leaks at the installation points.
4. Test After Installation
After installing the valve, turn the water supply back on and check for any leaks. Operate the valve to ensure it opens and closes smoothly without obstruction.
5. Secure Valve Position
Install the valve in a position that allows easy access and operation. Avoid placing valves in areas that are prone to freezing or difficult to reach during emergencies.
6. Professional Assistance
For complex installations, installations involving different pipe materials, or if you’re unsure about any part of the process, seek help from a licensed plumber to ensure the valve is installed correctly and safely.
Maintenance Tips for Kitchen Water Shut Off Valves
Regular maintenance of your kitchen water shut off valves ensures their reliability and prolongs their lifespan. Implement the following maintenance practices:
1. Regular Inspections
-
Visual Checks: Inspect the valve periodically for signs of leaks, corrosion, or wear.
-
Operational Testing: Operate the valve periodically to ensure it moves freely and seals properly when closed.
2. Clean and Lubricate
-
Cleaning: Remove any debris or buildup around the valve to maintain unobstructed operation.
-
Lubrication: Apply a suitable lubricant to the valve stem and moving parts to reduce friction and prevent rust, especially for older valves.
3. Tighten Connections
Ensure all connections are tight to prevent leaks. Use an adjustable wrench to make slight adjustments as needed, but avoid over-tightening which can damage the valve or pipes.
4. Replace Worn Components
-
Seals and Gaskets: Replace worn or damaged seals and gaskets to maintain a watertight seal.
-
Valve Replacement: If the valve shows signs of significant wear, corrosion, or fails to operate smoothly despite maintenance efforts, replace the entire valve to ensure system integrity.
5. Prevent Corrosion
-
Protective Coatings: Apply anti-corrosion coatings to metal valves to prevent rust and deterioration.
-
Environmental Control: Keep valves in environments that minimize exposure to corrosive elements, such as moisture and chemicals.
6. Handle with Care
Operate valves gently to prevent undue stress on internal components. Avoid using excessive force which can cause damage and lead to leaks or operational failure.
7. Professional Servicing
For valves that are difficult to maintain or any persistent issues, consult a professional plumber to perform advanced maintenance or repairs, ensuring optimal valve performance and safety.
Benefits of Kitchen Water Shut Off Valves
Installing and maintaining kitchen water shut off valves offers numerous benefits that enhance the functionality, safety, and efficiency of your kitchen plumbing system:
1. Water Damage Prevention
Quickly shutting off the water supply during a leak or burst pipe prevents extensive water damage to your kitchen and surrounding areas, saving you from costly repairs and restoration efforts.
2. Enhanced Safety
By controlling the water flow, shut off valves reduce the risk of water-related accidents, such as slips from wet floors or scalding from high-temperature water leaks.
3. Ease of Maintenance and Repairs
Shut off valves allow you to perform maintenance or repairs on specific kitchen fixtures and appliances without disrupting the entire water supply, making plumbing tasks more manageable and less invasive.
4. Water Conservation
By controlling and regulating water flow to specific fixtures, shut off valves help conserve water, contributing to lower water bills and a more sustainable household.
5. System Protection
Shut off valves protect your plumbing system and appliances from wear and tear caused by constant water flow, extending their operational lifespan and reducing the need for frequent replacements.
6. Improved Efficiency
Efficiently managing water flow ensures that each fixture receives the necessary water supply without wastage, enhancing the overall functionality and efficiency of your kitchen plumbing system.
7. Increased Property Value
A well-maintained plumbing system with accessible shut off valves adds value to your property, making it more attractive to potential buyers and ensuring compliance with building standards.
Conclusion
Kitchen water shut off valves are indispensable for maintaining a safe, efficient, and reliable plumbing system in your home. By understanding the different types of valves, their functions, proper installation methods, maintenance practices, and the myriad benefits they offer, you can ensure your kitchen remains a functional and secure space. Whether you're performing routine maintenance, addressing leaks, or upgrading your plumbing fixtures, having accessible and properly functioning shut off valves is crucial for protecting your home and enhancing the longevity of your plumbing system. Invest in quality valves, adhere to regular maintenance schedules, and seek professional assistance when necessary to enjoy a worry-free kitchen plumbing experience.